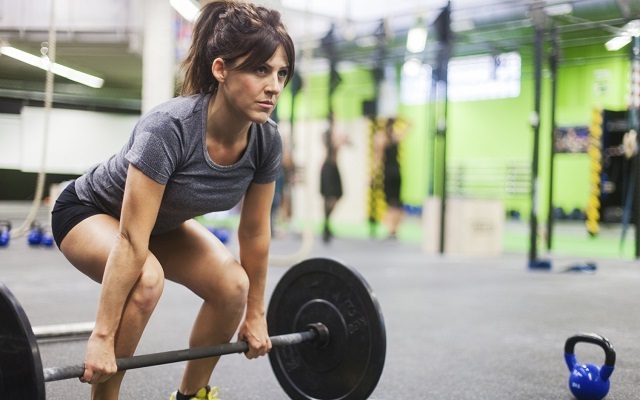
Think you know the deadlift? Take this quiz to test your knowledge
The deadlift is a fundamental exercise for strength training that targets multiple muscle groups, including the lower back, hamstrings, and glutes. Learning the proper technique for this compound movement is essential to maximize its benefits while minimizing the risk of injury. In this guide, we will break down the deadlift into five simple steps to help you master this exercise and incorporate it into your strength training routine.
Step 1: Stance
The first step in mastering the deadlift is finding the correct stance. Stand with your feet shoulder-width apart and position the barbell approximately one inch from your shins. Your feet should be turned slightly outward. The distance between your heels should be around eight to twelve inches. This positioning ensures that the barbell is directly above the middle of your foot, maintaining balance throughout the movement.
Step 2: Grip
Once you have assumed the correct stance, it’s time to establish your grip on the barbell. Use a double overhand grip with your thumbs wrapped around the bar. Position your hands close to your legs without rubbing your thumbs against them during the lift. Maintain a grip that feels secure but allows for a smooth pulling motion. Remember not to move the barbell during this step, as it should already be in the ideal starting position.
Step 3: Lowering Yourself to the Bar
With your grip secure, begin the lowering phase. Bend your knees and hinge forward at the waist while always keeping the hips lower than the shoulders. Avoid moving the barbell at this stage and ensure your knees are parallel to your feet. Slightly push your knees out so they make contact with your elbows. It’s crucial to maintain the barbell’s position above the mid-foot and avoid any unnecessary movement.
Step 4: Chest Up
Maintaining proper form is essential during the deadlift, and this step focuses on keeping your chest up. Lift your ribcage upward, rotating your chest between your arms. This contraction should extend down your back, tightening your lumbar spine. Squeeze your chest into the starting position while gripping the barbell. Pull the scapulae back and down. Keep the head in line or slightly hyperextended. Heels remain on the floor. Shoulders should be over or slightly in front of the bar. This step can be challenging due to hamstring tension, but with practice, it will become more familiar.
Step 5: The Pull
Now it’s time to execute the pull phase of the deadlift. Take a deep breath and hold it to provide support for your back. Begin dragging the barbell up your legs, ensuring it maintains contact throughout the movement. The barbell should follow a straight vertical line, starting directly above the mid-foot and ending at arm’s length with your chest up, knees and hips fully extended, and your spine in a neutral position. Your eyes should be looking slightly down, and your shoulders should be pulled back.
When you have completed the lift, it’s important to lower the barbell with control. Unlock your hips and knees, push your hips backward, and let the barbell slide down your thighs in a straight line. As the barbell passes your knees, you may bend them to finish setting the barbell down. Avoid unlocking your back during this process.
To practice your deadlift form, perform a set of five repetitions, paying special attention to your back position and keeping the barbell close to your legs. Once you are confident in your form, gradually increase the weight for a few sets. Monitor your progress and add more weight as long as you can maintain proper technique.
Mastering the deadlift takes time and practice, but by following these step-by-step instructions, you can develop a solid foundation and work towards increasing your strength and power. Remember to always prioritize proper form and consult with a fitness professional if you have any concerns or questions. Now, get ready to conquer the deadlift and take your strength training to the next level!